Welcome!

This informative blog allows plastics professionals to discuss plastics training and technology. Brought to you by Routsis Training: the plastic industry's premiere training provider.

Traditional Molding vs. Scientific Molding, Part 3: Troubleshooting

Can your process techs quickly and effectively troubleshoot molded part defects? If not, they are probably relying on ‘traditional’ troubleshooting techniques.

The Traditional Troubleshooter

A traditional troubleshooter does not know the history of the process and is only concerned with fixing the defect — not investing the root cause. By making changes based solely on past experience without a documented standard, the effectiveness of each change cannot be verified.

Traditional troubleshooting may result in a part that looks good. But each time the process is adjusted to solve a defect, you are effectively creating a new process. In such situations, it is impossible to maintain confidence that the parts you are molding now are the same as those produced during the last successful run.

The Scientific Troubleshooter

A Scientific Troubleshooter knows the history of a given process and determines the cause of a defect before making any changes. All adjustments are based on knowledge and are appropriately documented. By doing so, Scientific Troubleshooters are able to verify the results of any change against the documented standard.

Routsis Training has identified 7 steps that ensure good scientific troubleshooting. Managers should expect all their technicians to follow this systematic approach every time they troubleshoot a process.

  1. Develop a reliable Scientific Molding process that can compensate for normal variation.
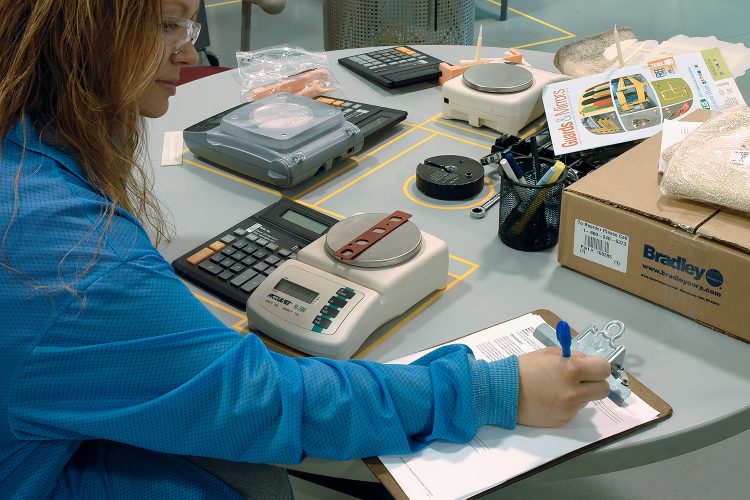
  2. Establish a Documented Standard Process by properly recording all relevant process outputs. Such documentation ensures everyone knows exactly what process results in good product.
  3. Examine the defective part and rule out obvious causes. More experienced technicians always do the best in this step.
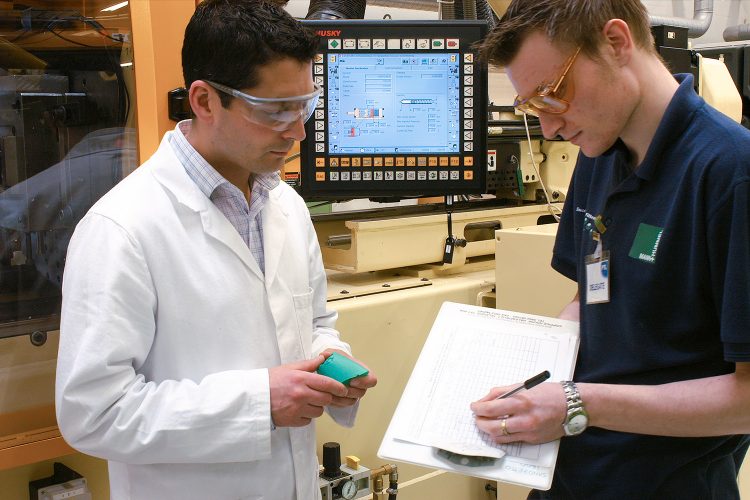
  4. Compare the current process with the Documented Standard Process and find out exactly what is different.
  5. Return the process to the Documented Standard. This may require just a few parameter adjustments — or it could involve changing or repairing something a water temperature controller or barrel heater band.
  6. Verify the part and process to ensure the relevant process outputs match the Documented Standard Process.
  7. Document all changes made to the process (or system). This will ensure you have an accurate record of the production run. If similar problems arise in the future, such documentation is essential for quick troubleshooting and resolution of the issue,

These steps are covered in more detail in our Scientific Molding courses. Please check out Routsis Training’s extensive Scientific Molding training library, which includes both online courses and our exclusive SkillSet™ hands-on training labs.

Traditional Molding vs. Scientific Molding, Part 2: Process Documentation

In any manufacturing application, it is essential to maintain accurate, relevant documentation. In this post, we will take a look at two vastly different approaches for documenting an injection molding process — and we’ll cover how only data-driven, scientific process documentation is suitable for modern manufacturing applications.

Traditional Process Documentation

Traditional molders put all their focus on documenting the machine settings — or process inputs — when a new process is approved. Inputs are parameters which are entered into the machine controls such as: speeds, temperature settings, timers, and positions.

Process inputs only reflect what is being entered into the machine and not the actual process that results from these settings. While this data is great information for a die setter who’s installing a mold, it is useless for troubleshooting the process.

Scientific Process Documentation

For Scientific Molders, process outputs are of primary importance. Process outputs are machine-independent, process-specific parameters. These parameters represent what is actually taking place within the process: the parameters necessary to consistently make good product.

Once the process is approved, this data forms the Documented Standard Process — a process that is easy to troubleshoot and replicate. This documentation includes measured temperatures, actual times, plastic pressure, product weight, etc. — and any additional information that’s important to the product or process.

You should have a Documented Standard Process for each product line. Furthermore, the process should be documented at each first piece approval. Scientific Molders use the process outputs to verify the correct process is being used each and every time a product is run. This Scientific Documentation should be used to verify the process matches the standard — during each startup and when troubleshooting part defects.


Documentation and troubleshooting are covered extensively in Routsis Training’s Scientific Molding training library, which includes both online courses and our exclusive SkillSet™ hands-on training labs.

Traditional Molding vs. Scientific Molding, Part 1: Establishing a Process

Scientific Molding is nothing new — yet many companies still rely on inefficient, outdated ‘traditional’ molding procedures. In this post, we cover the difference between these two methodologies and discuss how a scientific approach to process development can save time, money, and a lot of headaches.

The ‘Art’ of Traditional Molding

Traditional Molding involves processing each mold for a while, tweaking the settings until good parts come out. Once quality approves the parts, the process technician documents the machine settings and moves on.

This method of processing is inadequate for production because the processor does not learn enough about the process to answer to critical questions, such as:

  • Am I using the best injection speed?
  • Is the gate correctly sized?
  • Could the mold benefit from better venting?
  • Does the transfer position compensate for variation?
  • Does the packing pressure center the process window?
  • Is the gate sealed?
  • Should the gate be sealed?
  • How much tonnage is actually needed?
  • Am I running the fastest cycle within reason?
  • Am I using too much back pressure?
  • What is the optimal melt temperature?
  • Has screw recovery been optimized for maximum efficiency?
  • Is this process reliable?

Not every mold needs all these questions answered, but most of these should being asked when qualifying molds at your facility.

Scientific Molding: Good Parts Without Guesswork

Scientific Molding uses a systematic method of developing each phase of the process using the critical process data and information available. A Scientific Molder develops a robust, reliable, and data-driven molding process to establish:

  • 1st Stage Injection
  • 2nd Stage Packing
  • Part Cooling
  • Shot Recovery
  • Part Removal

Once a stable process is developed, the actual process outputs are documented. This makes troubleshooting a lot easier. And unlike traditional molding, a scientific molding process is machine-independent — meaning the process can be easily re-established or ported to another molding machine.

When compared to old-school traditional molding, a properly implemented Scientific Molding process will dramatically reduce scrap and downtime — resulting in a substantially more profitable molding operation. It’s critical that your engineers and technicians understand how to correctly establish and document a Scientific Injection Molding process.


The concepts discussed in this post cover only the most basic aspects of the Scientific Molding methodology. Please check out Routsis Training’s extensive Scientific Molding training library, which includes both online courses and our exclusive SkillSet™ hands-on training labs.

5 Simple Rules for Effective Processing

To put it bluntly, if your technicians and engineers are not following these 5 simple rules, your company is losing money. Although these are just basic best practices for our industry, there are very few companies that consistently follow all 5 of these steps. Those who do are some of the most competitive companies in the plastics industry.

Change One Aspect at a Time

When adjusting a process, change only one aspect of the process at a time. This allows time for the specific adjustment to take place — allowing you to be more deliberate in your changes. Most importantly, it avoids confusion and allows you to determine the exact cause and effect of the change you made.

Make Significant Changes

Your changes must be big enough to actually see something happen. If you adjust your mold temperature by only 2 degrees, that is not significant enough to notice any change, as temperatures can fluctuate as much as 5 degrees under normal conditions.

If you believe something is going to help, make a big adjustment and see what happens: If it went to far, you can always dial it back a little. If it didn’t help, go to the next rule.

If a Change Does Not Help, Change It Back

If a change does is not effective, you must change it back. Unnecessary changes cause the process to drift further and further away from the standard process.

Properly Document the Process That Makes Good Parts

While a simple setup sheet with all the process inputs is great for die setters, processing and troubleshooting require documentation of the actual process outputs that makes a good part. There should be a standard documented process for each mold — as well as a process sheet generated each time first piece approval occurs.

Document all Changes to the Process

Any and all changes that occur after first piece approval must be documented. Process changes are important, but also include anything else that affects the system, such as: repairs, cleaning, mold adjustments, and equipment changes. Every molder should have a documented process at first piece approval — along with a list of all changes for every single production run.


The steps outlined above are an important aspect of the Scientific Molding methodology. Please check out Routsis Training’s extensive Scientific Molding training library, which includes both online courses and our exclusive SkillSet™ hands-on training labs.

Stop Wasting Material: Learn the Right Way to Purge Your Barrel

FACT: A purging compound will help you purge better than no purging compound. Furthermore, there are some simple concepts and techniques that will ensure excellent results from your purging compound — better results than can be achieved by just following the manufacturer’s recommended procedures.

Unfortunately, bad purging habits and poor purging procedures are pervasive in the plastics industry — which is why we produced our Scientific Purging courses. In this post, we will discuss a few of the important topics introduced in Purging Techniques, the first program in our Intermediate Purging course.

Safety First: Acetal and PVC Don’t Mix

First off, there is absolutely no safe way to purge between Acetal and PVC. Unless you pull and clean the nozzle, hopper, hopper loader, grinder, blender, drier, end-cap, screw, screw tip, and check ring you risk a potentially deadly combination of PVC and POM. Every plant that processes these two materials must have procedures in place to prevent them from being used in the same machine, drier, grinder, or material blender.

Barrel Capacity ≠ Max. Shot Size

It’s a common misconception that Barrel Capacity and Maximum Shot Size are equivalent. Note that the barrel capacity indicates the amount of material contained in the screw flights. This varies with screw design and is not provided to you by your machine manufacturer. In reality, barrel capacity is typically between 2x and 2.5x the maximum shot size.

With this in mind, a quantity of purging compound equal to one half of barrel capacity is roughly equivalent to the maximum shot size. If you need a barrel full of purging compound, you will need to use a quantity that is at least 2x the maximum shot shot size.

Barrel Capacity is not the maximum shot size, it is the amount of material contained in the flights of the screw. Although this number is not provided to you by your machine manufacturer, it is typically between 2 & 2.5 times your maximum shot size.

Small Shot Purging is Most Effective

Small Shot Purging involves using 10% to 20% of your machine’s maximum shot size in each purge shot. This technique is preferred over using fewer large shots, as it keeps material moving in the feed zone, cycles the check ring more times, and increases agitation within the screw flights.

Take It Easy with Back Pressure

Minimum back pressure should be used when purging. In fact, it is usually best use no back pressure at all. Remember that the purpose of purging is positive conveyance. Back pressure creates back flow in the screw channels, which is counterproductive to purging.

Back pressure can be used to purge-out a hot runner system (like an extruder). But this is only done after the barrel itself has been thoroughly purged.

Wet Purging is Best: Always Keep Material in the Barrel

You should never empty the barrel: Always keep the barrel full of material. This is called ‘wet purging’ — and it is far more effective than ‘dry purging’.

Even when “empty”, there is material still stuck to the screw and barrel. This material will burn and degrade, risking contamination when it eventually breaks off and finds its way into the plastic melt.

Keep the barrel full of material maintain positive conveyance during purging. This eliminates the risk of ‘baking‘ the material. To ensure a full barrel, use a telescoping mirror over the feedthroat so you can stop purging when the screw flights become visible.

Take Care When Processing Unstable Materials

When processing unstable materials, it is necessary to replace them with heat stable materials such as a polyolefin or a purging compound any time the machine is stopped or shut down. Keeping in mind what we mentioned above, you will need at least 2x the maximum shot size to fill the barrel with heat stable material.


Be sure to check out Routsis’s Intermediate and Advanced Purging courses for Scientific Molders. These courses teach injection molders about proper material purging concepts, procedures, materials, methods, and cost analysis.